
20 Advanced Tricks for AI Image Generation That Most People Skip
Raman Singh
Raman Singh is a highly skilled marketing professional who serves as the head of marketing at Copyrocket AI
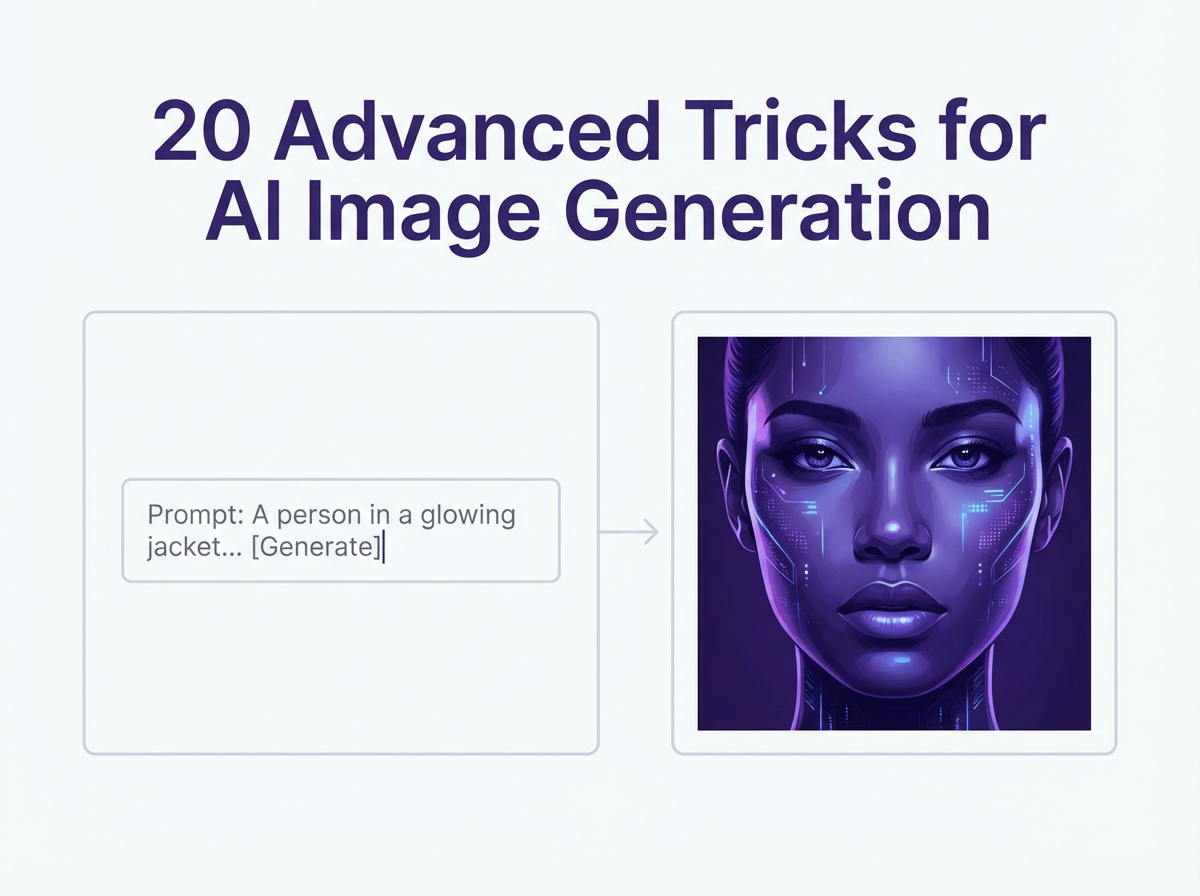
AI image tools can produce good images fast. Advanced users get consistent, high-detail results because they control prompts, composition, lighting, and edits with clear steps.
This guide shares 20 Advanced Tricks for AI Image generation you can use in Midjourney, Nano Banana Pro, GPT Image 1.5, Adobe Firefly, and other AI art generators.
Each trick includes a direct instruction you can apply today.
Key Takeaways
- Use a clear prompt formula that locks subject, scene, camera, light, and style.
- Control consistency with seeds, reference images, and style weights.
- Fix hands, faces, and text with inpainting and targeted edits.
- Improve realism with lens choices, depth of field, and light direction.
- Use negative prompts and constraints to stop common artifacts.
- Build a repeatable workflow with iteration, upscaling, and post checks.
These sections cover prompt control, composition, consistency, and editing. Follow the steps under each trick. Save the prompts you like. Reuse them as templates for future work.
Check out our Prompt generators;
Prompt Architecture: Get Control Before You Add Style
Most quality gains come from structure. A structured prompt gives the model fewer chances to guess. Use these tricks to make outputs stable and repeatable.
1) Use a 6-part prompt formula
Instruction: Write prompts in this order and keep each part short.
- Subject: who or what
- Action: what the subject does
- Scene: where it happens
- Composition: framing and angle
- Lighting: direction and quality
- Style + quality: medium, era, render type
Example prompt: “A pastry chef pipes frosting on a cake, inside a small Paris bakery, medium shot, eye-level, soft window light from the left, 35mm photo, high detail, natural color.”
2) Use constraints to reduce randomness
Instruction: Add 2 to 4 constraints that remove unwanted variation.
- Specify time: “early morning”, “blue hour”, “midday”
- Specify weather: “light rain”, “clear sky”
- Specify palette: “muted earth tones”, “monochrome”
- Specify materials: “brushed steel”, “linen”, “matte ceramic”
Example add-on: “muted earth tones, matte surfaces, no neon.”
3) Write negative prompts like a checklist
Instruction: Keep a reusable negative prompt list. Add items based on your failures.
- Common fixes: “extra fingers, fused hands, deformed face, crossed eyes, blurry, low detail, watermark, logo, text, jpeg artifacts”
- Style control: “cartoon, anime, illustration” (if you want photo)
- Composition control: “cropped head, out of frame, bad anatomy”
Tip: Do not overstuff negatives. Start with 8 to 15 items. Add more only if the issue repeats.
4) Use “must-have” tokens and “must-avoid” tokens
Instruction: Add a short “must-have” line and a short “avoid” line at the end.
- Must-have: “sharp eyes, clean skin texture, natural pores”
- Avoid: “avoid plastic skin, avoid heavy makeup, avoid extreme smoothing”
This method improves clarity because it tells the model what to prioritize.
5) Use prompt weighting (if your tool supports it)
Instruction: Increase weight on the subject and reduce weight on background noise.
- Stable Diffusion style: “red leather jacket:1.3”
- Midjourney style: use emphasis with repeated words or tool-specific syntax
Example: “product photo of a wristwatch:1.4, studio background:0.8, softbox lighting:1.2”
6) Use “style last” to protect the subject
Instruction: Put style terms at the end. Keep the first half factual.
- Start with: subject, action, scene, composition
- End with: medium, artist references (if allowed), era, render type
This reduces cases where style destroys anatomy or adds unwanted props.
Composition and Camera Tricks: Make Images Look Intentional
AI often creates a subject but fails at framing. These tricks force stronger composition. They also help you get “camera-like” results instead of random snapshots.
7) Lock the shot type and angle
Instruction: Choose one shot type and one angle. Do not list many.
- Shot types: “close-up”, “medium shot”, “wide shot”, “full body”
- Angles: “eye-level”, “high angle”, “low angle”, “top-down”
Example: “full body, low angle, centered subject.”
8) Use lens and focal length terms
Instruction: Add a focal length to control distortion and depth.
- 24mm: dramatic, wide, more distortion
- 35mm: natural documentary look
- 50mm: balanced portrait and product
- 85mm: flattering portraits, strong background blur
Example: “85mm portrait, shallow depth of field.”
9) Use depth of field as a quality lever
Instruction: State depth of field and focus target.
- “shallow depth of field, focus on eyes”
- “deep focus, everything sharp” (for architecture)
Tip: If the image looks messy, use shallow depth of field to hide background errors.
10) Use composition rules as explicit text
Instruction: Add one composition rule. Do not add five.
- “rule of thirds, subject on left third”
- “symmetrical composition, centered”
- “leading lines toward subject”
- “negative space on right”
This improves layout and reduces random cropping.
11) Control aspect ratio for the platform
Instruction: Pick an aspect ratio that matches the final use.
- Instagram post: 1:1 or 4:5
- Stories and Shorts: 9:16
- YouTube thumbnail: 16:9
- Print poster: 2:3 or A-series ratio
Tip: If your tool supports it, generate wide and crop later for safety.
Lighting and Color: Make AI Images Look Real
Lighting drives realism. Color drives mood. These tricks use simple words that models understand well.
12) Specify light direction and source
Instruction: Name one main light source and its direction.
- “soft window light from the left”
- “golden hour sunlight from behind”
- “overhead fluorescent office light”
- “single softbox at 45 degrees”
Tip: If you want drama, use “hard light” and “sharp shadows.”
13) Use three-light terms for studio looks
Instruction: Use “key light”, “fill light”, and “rim light” in one line.
- Example: “studio portrait, key light softbox, gentle fill, rim light on hair”
This helps the model separate subject from background.
14) Control color with palette words
Instruction: Choose one palette and one contrast level.
- Palettes: “pastel”, “earth tones”, “cool blues”, “warm amber”
- Contrast: “low contrast”, “high contrast”
Example: “cool blues, low contrast, soft highlights.”
15) Add film and sensor cues for texture
Instruction: Use one film cue or one sensor cue, not a long list.
- “35mm film grain”
- “medium format photo”
- “cinematic color grade”
Tip: If skin looks plastic, add “natural skin texture, subtle film grain.”
Consistency Tricks: Keep Characters and Styles Stable

Consistency matters for brands, comics, product lines, and campaigns. These tricks reduce drift across generations.
16) Use seeds for repeatable results
Instruction: Fix a seed for a series. Change one variable at a time.
- Keep seed constant while you test lighting or wardrobe.
- Then keep lighting constant while you test backgrounds.
Tip: Save the seed and prompt in a spreadsheet so you can recreate the look later.
17) Build a character “identity line”
Instruction: Write one line that never changes for that character.
- Include: age range, face shape, hair, key feature, wardrobe anchor
Example identity line: “Woman, late 20s, oval face, short black bob, small scar on left eyebrow, white linen shirt.”
Then add scene lines after it.
18) Use reference images the right way
Instruction: Use one reference for identity and one reference for style, if your tool supports it.
- Identity reference: face, outfit, product shape
- Style reference: lighting, palette, medium
Tip: If the tool offers “style strength” or “image weight,” start in the middle. Increase slowly.
19) Create a style lock prompt block
Instruction: Make a reusable block you paste into every prompt for a project.
- Example block: “clean editorial photo, soft contrast, neutral background, natural skin texture, sharp focus, realistic color”
This block keeps the series cohesive even when scenes change.
Editing and Repair: Fix What the Model Breaks
Advanced users treat generation as step one. They fix errors with targeted edits. These tricks improve hands, faces, text, and small details.
20) Use inpainting for hands, faces, and logos
Instruction: Generate first. Then inpaint only the broken area.
- Mask the hand or face.
- Prompt only what you need: “right hand holding a coffee cup, five fingers, natural pose.”
- Keep the rest of the prompt short to avoid new changes.
Tip: Use a lower denoise strength for small fixes so the tool keeps the original structure.
Bonus Advanced Workflow: Turn Tricks Into a Repeatable System
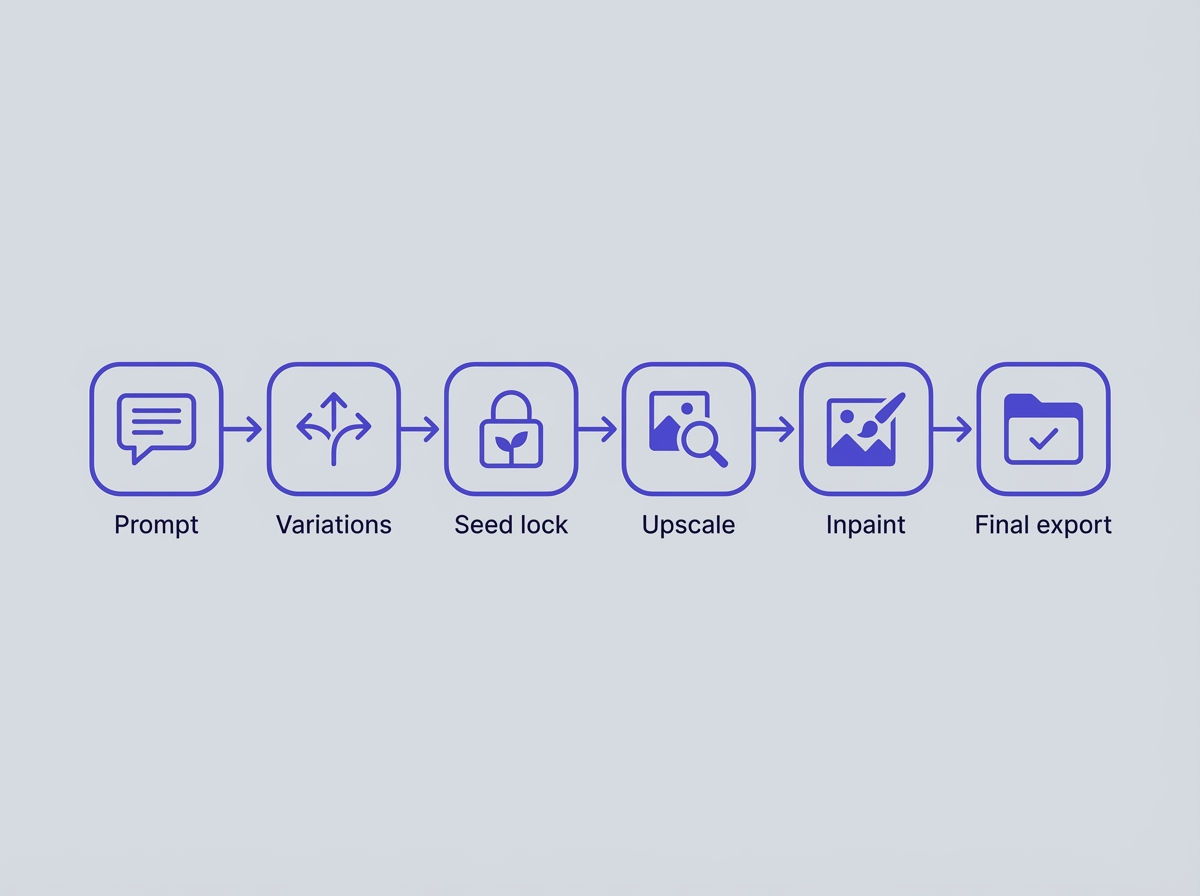
These steps combine the tricks above into a workflow you can repeat. Use it for marketing images, product shots, thumbnails, and social posts.
Step-by-step workflow you can reuse
- Step 1: Write the 6-part prompt formula (Trick 1).
- Step 2: Add constraints for time, weather, and palette (Trick 2).
- Step 3: Add a short negative prompt list (Trick 3).
- Step 4: Lock composition and lens (Tricks 7 and 8).
- Step 5: Lock lighting direction (Trick 12).
- Step 6: Generate 8 to 16 variations, then pick the best 2.
- Step 7: Regenerate with a fixed seed for consistency (Trick 16).
- Step 8: Upscale, then inpaint errors (Trick 20).
- Step 9: Run a final check: hands, eyes, text, edges, background.
Quality checklist for better AI-generated images
- Eyes look aligned and sharp.
- Hands show five fingers with clean joints.
- Skin shows texture, not waxy blur.
- Edges look clean around hair and glasses.
- Background supports the subject and stays simple.
- Colors match the intended palette.
Frequently Asked Questions (FAQs)
What is the most intelligent AI image generator?
The most intelligent AI image generator depends on your goal. For strong prompt understanding and clean edits, many users pick tools like DALL·E or Midjourney. For deep control and local workflows, many users pick Stable Diffusion.
How to get better AI-generated images?
Use a structured prompt, lock composition and lighting, add a short negative prompt list, generate multiple variations, then upscale and inpaint the errors.
What are the most advanced things AI can do?
AI can generate images from text, edit images with inpainting, keep a character consistent with references, transfer style, extend images with outpainting, and produce high-resolution outputs with upscalers.
What is the #1 AI image generator?
There is no single #1 AI image generator for every use case. Midjourney often ranks high for fast, artistic quality. Stable Diffusion often ranks high for control and customization. DALL·E often ranks high for prompt accuracy and editing.
Why do AI images fail on hands and text?
Many models learn patterns from large datasets, so they can confuse small structures like fingers and letters. Inpainting and targeted prompts fix most of these errors.
Should I use long prompts or short prompts?
Use medium-length prompts with clear structure. Add detail only when the model keeps guessing wrong. Remove extra words when the output drifts.
Final Thoughts
Use these 20 Advanced Tricks for AI Image generation as a system: structure the prompt, lock composition, control light, keep consistency with seeds and references, and repair flaws with inpainting. Save your best prompt blocks and reuse them for every project. If you want faster wins, pick three tricks today, test them on one idea, and keep the settings that improve your results.
Call to action: Copy the 6-part prompt formula, run 10 variations with one fixed seed, and share your best result with your prompt notes so you can repeat the style on demand.
Frequently Asked Questions
Written by
Raman Singh
Raman Singh is a highly skilled marketing professional who serves as the head of marketing at Copyrocket AI. With years of experience in the field, Raman has developed a deep understanding of all asp
View all postsYour AI Marketing Agents
Are Ready to Work
Stop spending hours on copywriting. Let AI craft high-converting ads, emails, blog posts & social media content in seconds.
Start Creating for FreeNo credit card required. 50+ AI tools included.
Related Articles
 General
NotebookLM For Coders: Turn Docs Into Faster Code
Code work often fails for a simple reason. You do not have the right context at the right time. You read docs in one tab, skim tickets in another tab, and then...
 General
How to Optimize for AI Search in 2026: The Complete Guide
AI search has shifted from experimental feature to primary search method for millions of users. ChatGPT Search, Google AI Overviews, Perplexity, Claude, and Gem...
 General
Claude Opus 4.6 Review: Here's What New!
Claude Opus 4.6 from Anthropic draws attention because teams want an AI model that writes better code, follows instructions, and stays consistent across long se...